Starting and Configuring Spyder
Preliminaries
-
You should have already installed the necessary software on your own laptop following the instructions in Lab 0.
-
If you can’t get any of the required software to work on your own computer, you can use it on the virtual desktop. Instructions for doing so can be found here.
Starting Spyder
-
On Windows, use the Start Menu (the Windows icon in the lower-left corner) to search for Spyder and run it.
-
On macOS, it depends on how you installed Spyder.
-
If you installed Spyder as part of Anaconda, the easiest way to start it is to do the following:
-
Run Terminal.
-
Enter the following from the command line:
spyder
-
-
If you installed Spyder on its own using the standalone installer, use the Spotlight tool to search for Spyder and run it.
-
Configuring Spyder
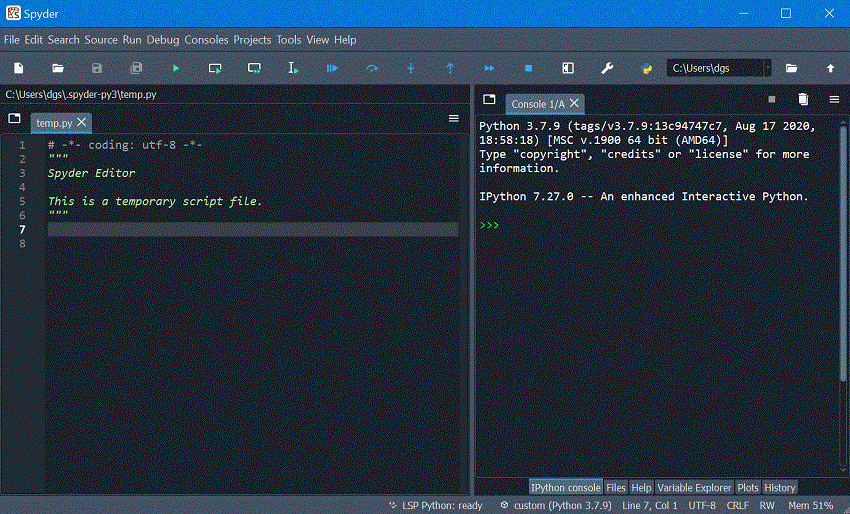
As part of Lab 0, you were asked to configure Spyder. If you did it correctly, Spyder should look something like the following:

Two things to note:
-
You should see two separate panes within the Spyder window: the Editor on the left and the IPython console on the right.
-
You should see a
>>>prompt in the IPython console pane.
If you don’t see these things, you should take the steps needed to configure Spyder.
One other key point: At the top of the IPython console, you should see some version of Python 3, as highlighted by the blue box that we’ve added to the image above. It doesn’t matter what comes after the 3. All that matters is that you see Python 3 and not Python 2. If you see Python 2, you will need to uninstall Spyder and reinstall it following the directions in Lab 0.
Last updated on September 7, 2025.